
When a patient makes it to the Chair, Checkout, or Complete status, you need to complete or post each procedure before completing the appointment so those procedures will show up in the ledger, be counted as production, and be eligible for insurance claim submission. But did you ever wonder why procedures show up as either Post or Complete?
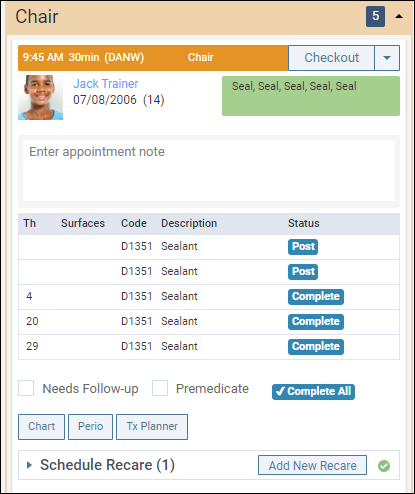
When a procedure is scheduled from the treatment planner, the name of the procedure’s completion button is Complete. The name conveys the idea that a treatment-planned procedure was completed.
In addition to the Complete button, tooth number and tooth surfaces are listed for each procedure as listed from the treatment planner.
When a procedure is added to an appointment using the Procedure search box in the Patient Appointment card, the name of a procedure’s completion button is Post. The name conveys the idea that you are capturing work performed today to the patient’s ledger.
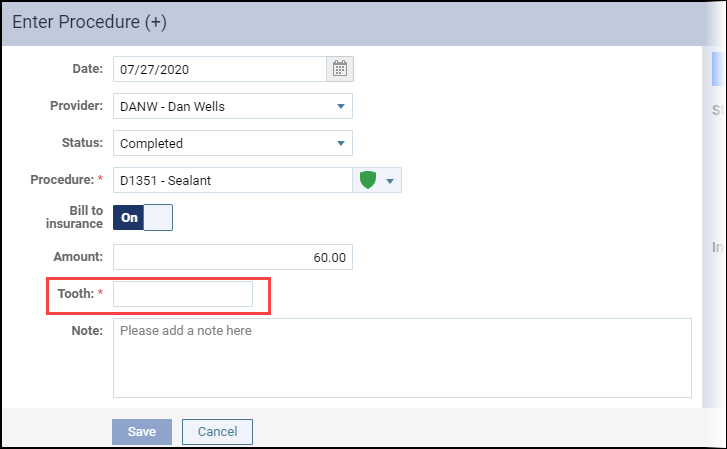
When procedures are added the appointment, there is no option to add tooth numbers or tooth surfaces. As a result, this information will be initially missing until you click Post.
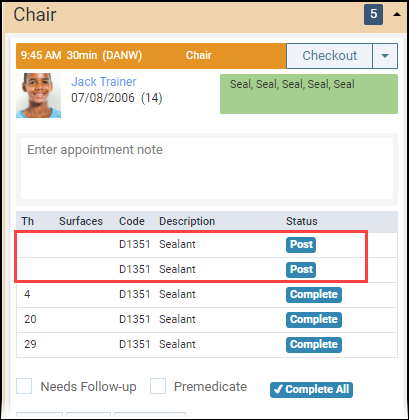
When you click Post, a wizard opens to help you add information for the posted procedures.
Additional Information
- For every patient appointment, you need to make sure all the procedures performed by the doctor or the hygienist are marked as completed.
- Completed procedures automatically post to the Ledger.
- You can complete procedures from the patient’s Progress Notes. It uses the same naming convention as the routing panel.
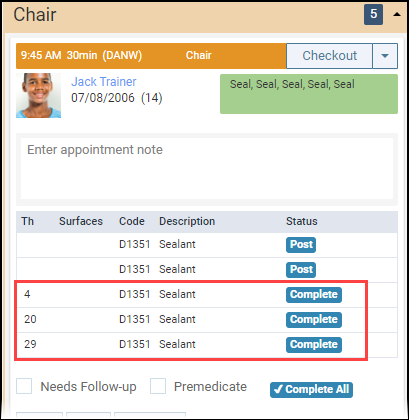
- In the routing panel, you can complete each procedure individually by clicking Post or Complete, or you can click Complete All to complete or post all of the patient’s procedures at once.
- To learn more about completing procedures, read Completing appointments in the Resource Center.