

Efficiency is making the best use of available resources, resulting in the least waste possible. Did you know that you can import user accounts in bulk from a file rather than adding them one at a time?
IMPORANT: You can only import for one role and location combination at a time. This means you must create a file for each user role and location combination in your organization.
How to:
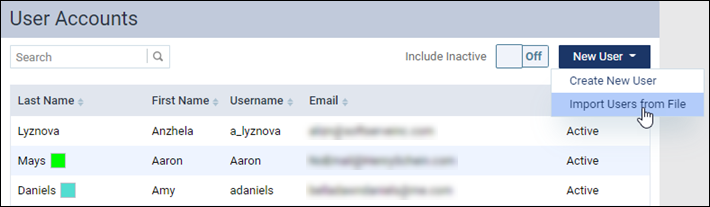
- Build your import files. To get started, open the User Accounts page (under the Settings menu). From the New User menu, select Import Users from File to open the import wizard.
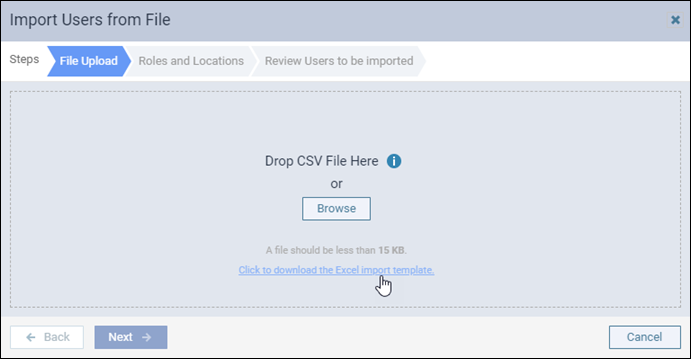
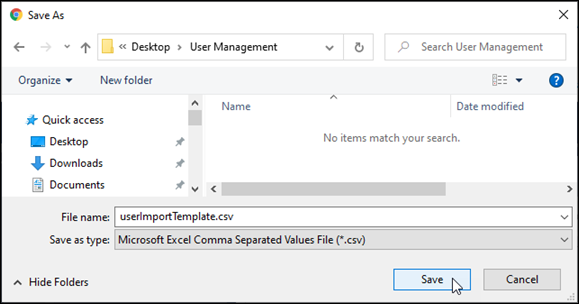
- In the Import Users from File wizard, click the Click to download the Excel import template link, and select a location where you want to save the .csv file.
- Open your template, and save it as a copy with a new file name to preserve the original. Choose which role and location combination you want to import first, and enter the field information exactly as specified. Note that user roles and locations must be the same per template upload.
For non-provider roles, your file must include the following required fields:
- First Name
- Last Name
- Username (must be unique)
- Phone Number
- NO (means the user is not a provider)
For example:

Note: The Import Users from File wizard has an inactivity Timeout which automatically defaults to 1 hour.
For provider roles, your file must include the previous fields and the following fields:
- YES (means the user is a provider)
- Shortname
- Address
- City
- State abbreviation
- ZIP Code (must be 9 digits) Example: 123450000
- NPI number
- DEA number
- TIN number (must include the “dash”) Example: 12-3456789
- State ID # (must be numbers enclosed in quotation marks)
For example:

- When you have your file populated, save it, and then return to the wizard. Either drag the file to the box containing “Drop CSV File Here,” or click Browse to locate and select the file.
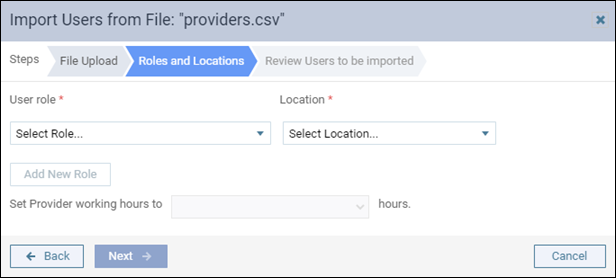
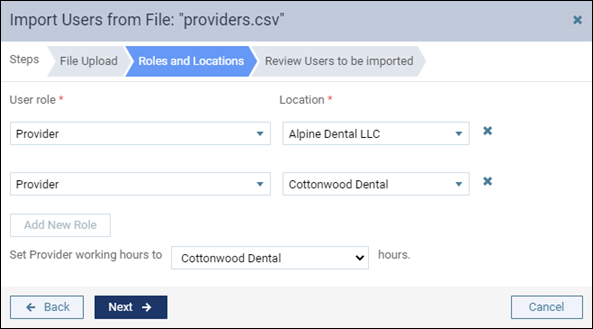
- After you select the file, the wizard takes you to the next step, where you will identify the user roles and locations shared by each new user included in the file. From the lists, select the user roles and locations for this batch. For example, to import users with Provider roles into two locations, select that role for each location. For providers, you will also select the working hours. Click Next to continue.
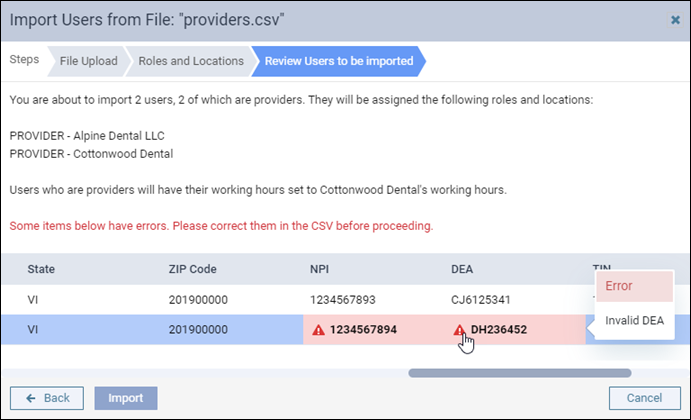
- Review the information from the .csv file before completing the import. If there is duplicate information, Dentrix Ascend will highlight the duplicate so you can make changes. Use the scroll bar to locate errors, and click on the warning icon for more information. If changes are needed, cancel out of the wizard, make your changes in the file, and then go through the wizard setup again.
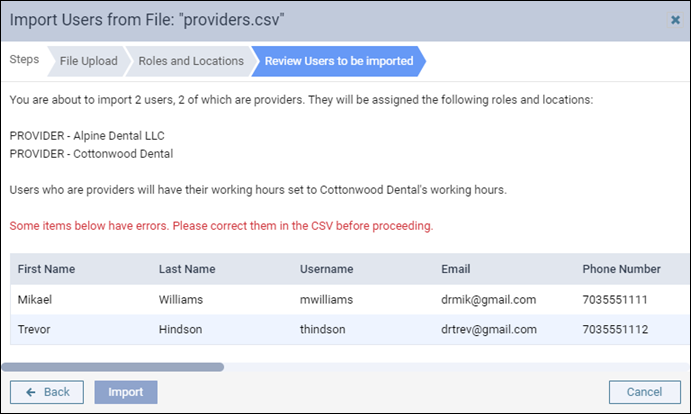
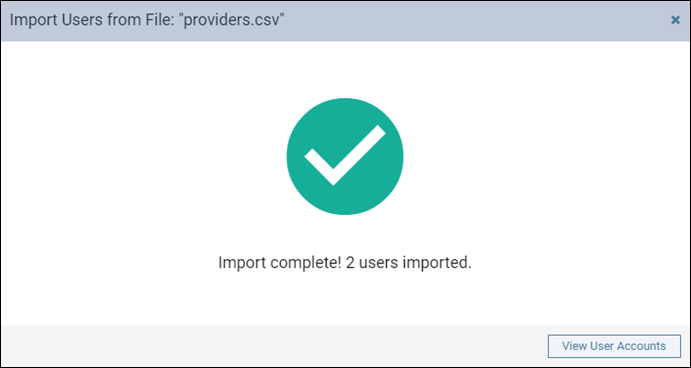
- If there are not any errors to address, click Import. When the import is complete, you will see a completion message. The uploaded user accounts will now be listed on the User Accounts page.
Repeat the import for each set of roles and locations in your organization.
Additional Information
- Note that the file size limit is 15 KB. That’s enough to include about 100 users, which would be an unusual case.
- After importing, you must go into each provider user account and change the provider color (the default color is white). You must also configure the Contracted With list and possibly the provider fee schedule if it differs from the location’s UCR fee schedule.