October 21, 2020
Do you want to save time during checkout?
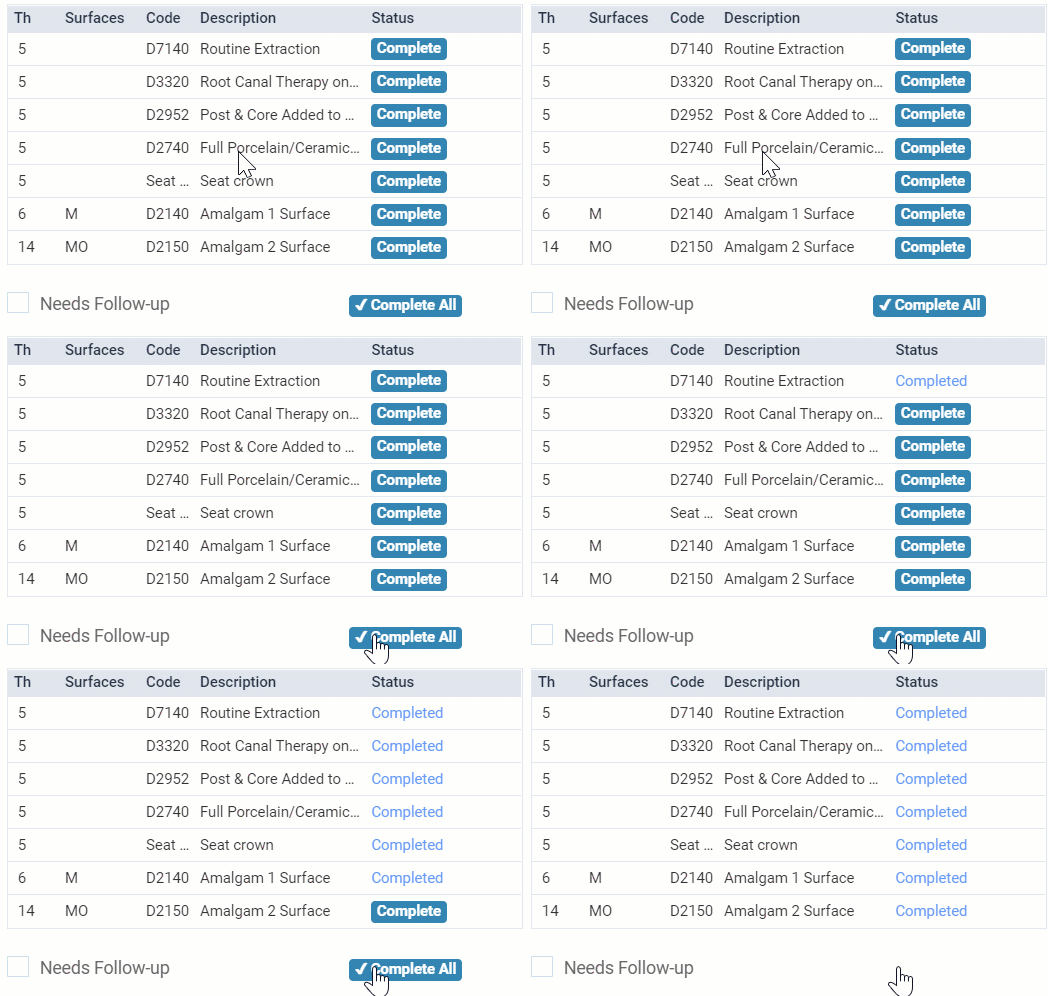
Once you move the patient to the Chair, Checkout, or Complete status, you need to complete or post each procedure before completing the appointment. Instead of completing and posting each procedure individually, you can use the Complete All button to complete or post all the procedures at the same time.
How To:
Depending on your office workflow, when a patient’s status on the routing panel becomes Chair, Checkout, or Complete, click the Complete All button. You will see the status of each procedure change to Completed in real-time.

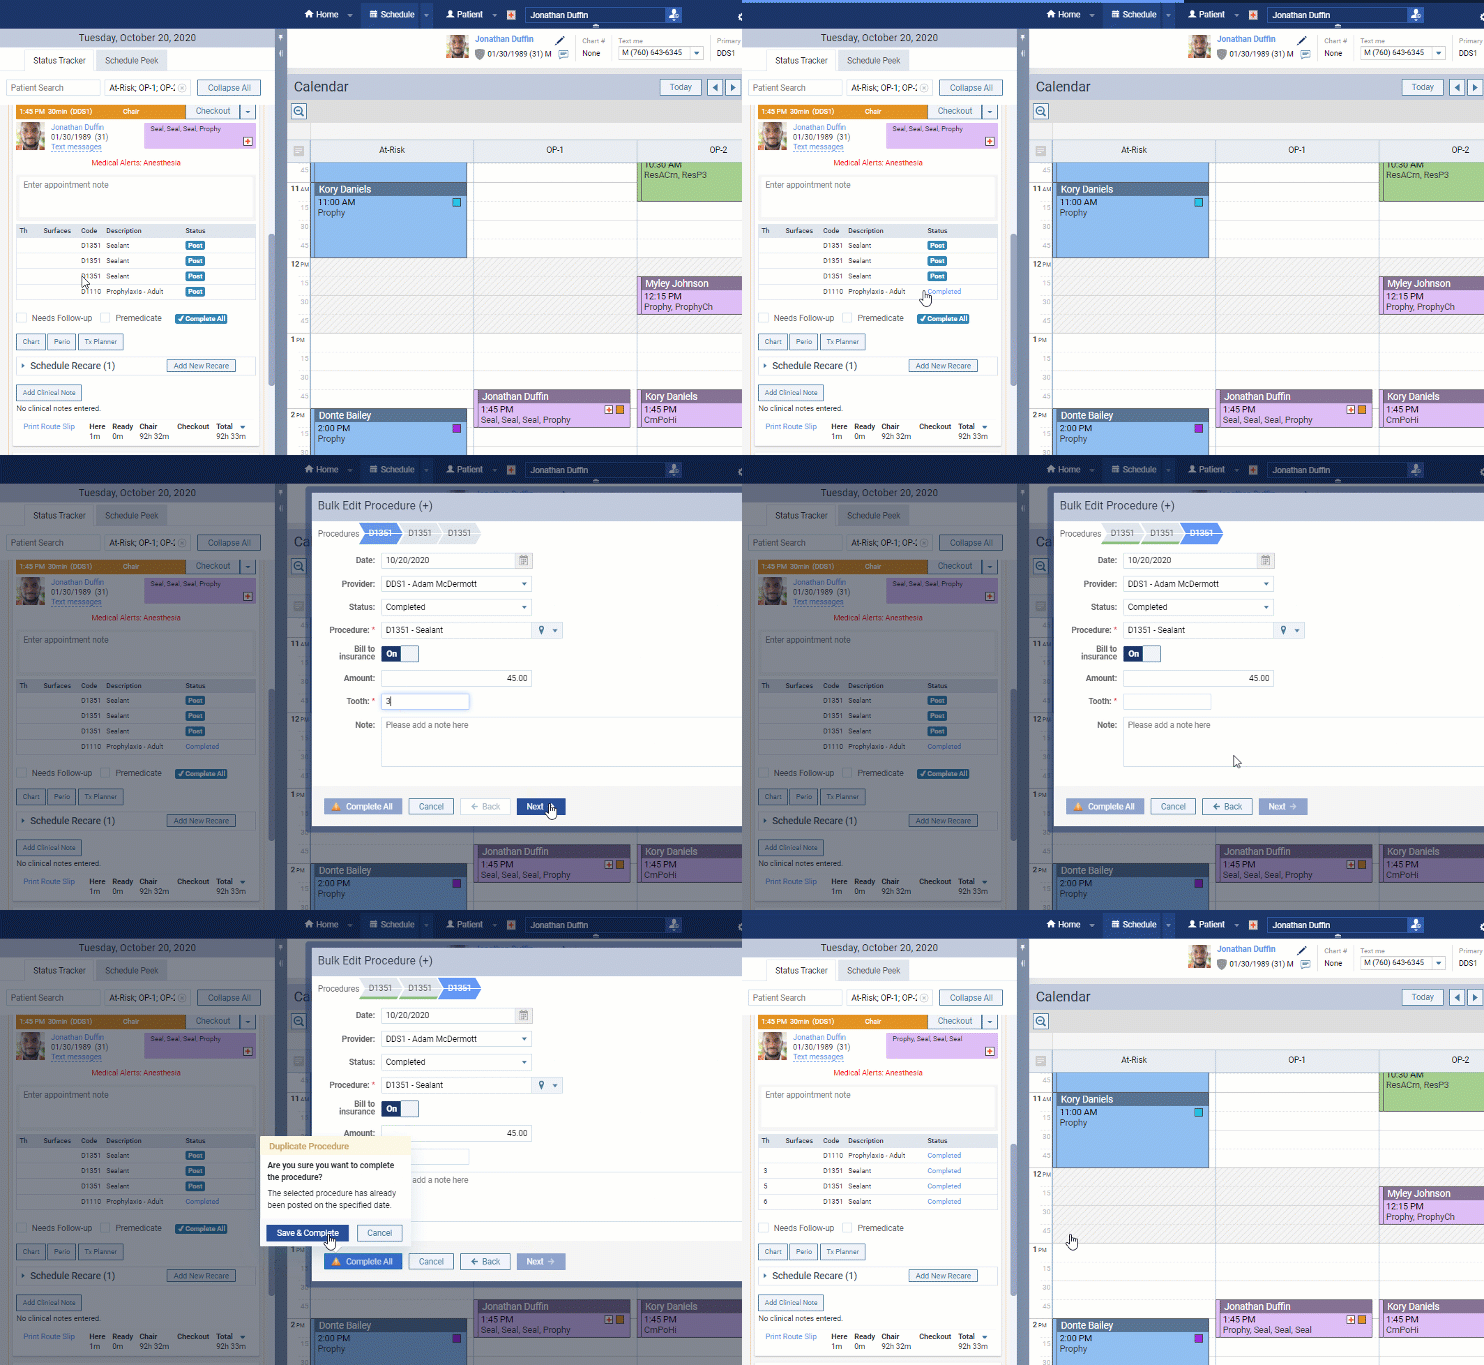
If a tooth number or tooth surface is missing, the Bulk Edit Procedure dialog box opens.
- Enter the missing tooth number or tooth surfaces, and click Next if another procedure was performed to enter the missing tooth number or tooth surfaces.
- Click Complete All to complete all the procedures.
A green notification message appears to confirm that all procedures have been completed successfully.

Additional Information
- You need to complete or post each procedure before completing the appointment, so those procedures will 1) show up in the ledger, 2) be counted as production, and 3) be eligible for insurance claim submission.
- If you post procedures with the same code and treatment area on the same day, the Duplicate Procedure popup window appears. You can click Save & Complete to save the procedure or Cancel to make the correction before proceeding.
- On the routing panel, you can complete each procedure individually by clicking Post or Complete, or you can click Complete All to complete or post all the patient’s procedures at once.
- To learn more about completing procedures, read Completing appointments in the Resource Center.

